
DIY Silk Tie Dyed Easter Eggs Craft
Silk tie-dyed Easter eggs are so much fun to make and way less messy than buying a dying kit or using vinegar and food coloring! Make beautiful-looking dyed Easter Eggs with this easy DIY Silk Tie Easter Eggs Tutorial.
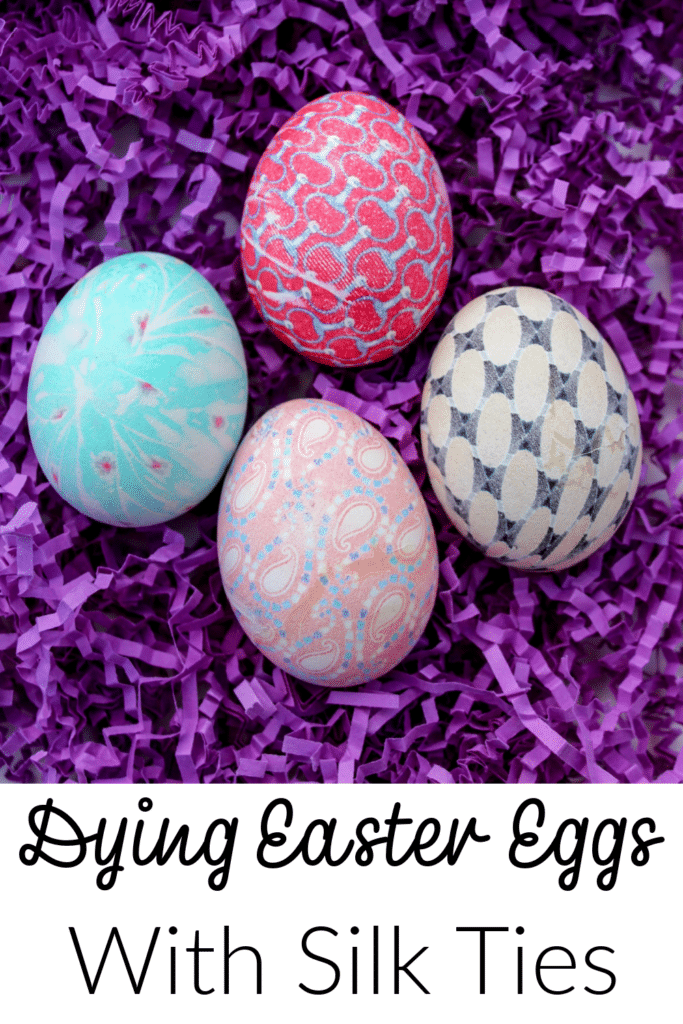
DIY Silk Tie Dyed Easter Eggs
Recently, I went through my husband’s ties. He has quite the “vintage” collection. It just so happens, each year we try to mix up some fun and unique ways to dye our Easter eggs. I decided that instead of throwing out his ties, we would use them for a fun new project.
Not only did I declutter and organize my husband’s ties, but I was able to use them in this DIY Silk Tie Dyed Easter Eggs Tutorial below. Pretty cool! It certainly made me feel like Marie Kondo.
Why You Will Love Coloring Your Eggs With Silk Ties
- Beautiful Decor: Once dyed, these eggs can be displayed as stunning Easter decorations. They can add flair to your home, enhance your spring décor, and even be used as centerpieces for festive gatherings.
- Minimal Mess: Compared to other egg dyeing methods, silk tie dyeing generates less mess, as there are no liquid dyes to spill. This can make the experience more enjoyable and less stressful for parents.
- Great for All Ages: This activity is inclusive of all ages, making it a wonderful family bonding experience. Kids can help with wrapping the eggs while adults manage the dyeing process, promoting teamwork and creativity.
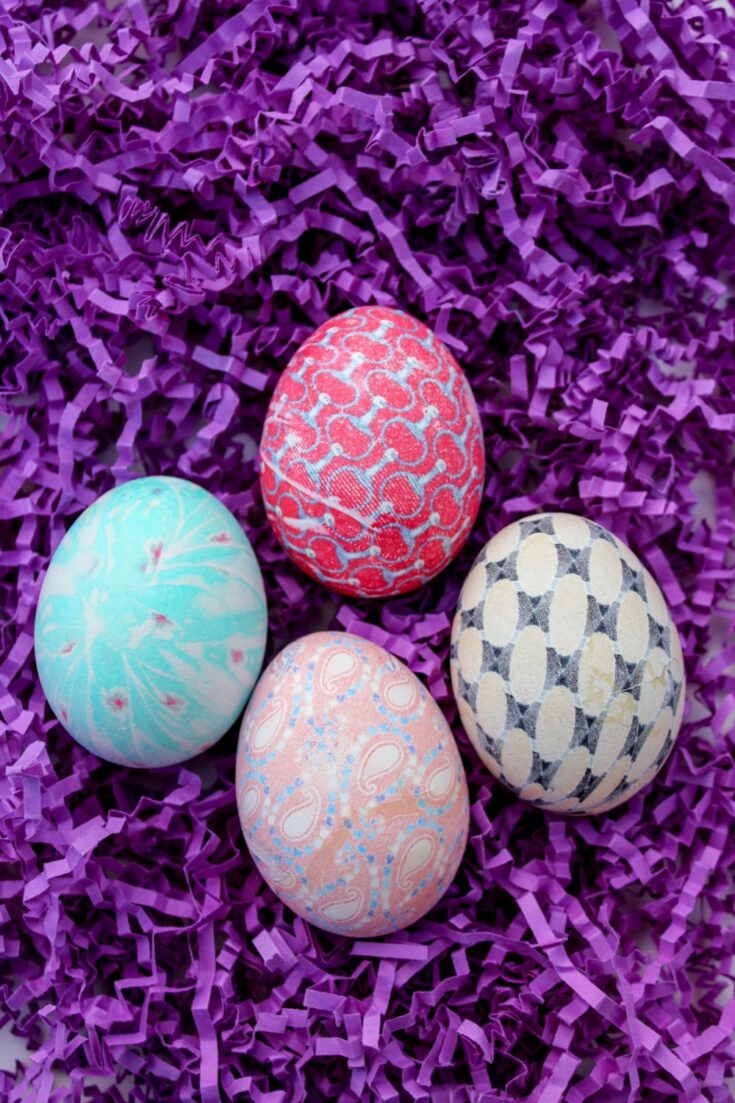
- Unique Designs: Each egg will feature intricate and one-of-a-kind patterns. The silk ties create vibrant colors and beautiful designs that can’t be replicated, making your Easter decorations truly special.
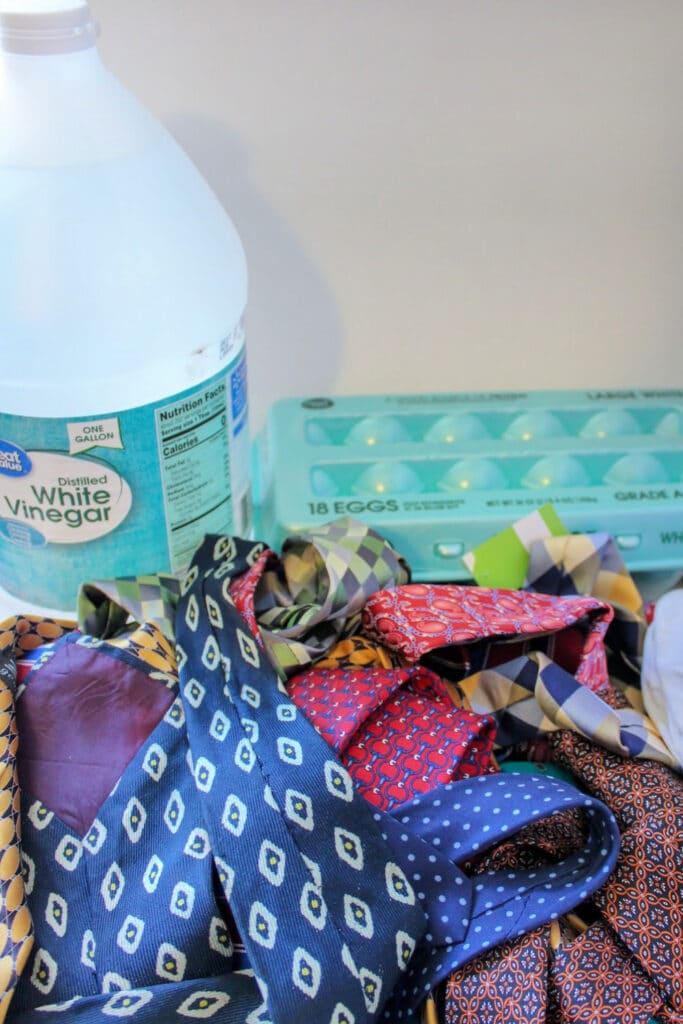
You Will Need To Make Your Easter Eggs
- Eggs – You will not need to prep them in any way before, unless of coarse your eggs are farm fresh. You will then just have to make sure the eggs are cleaned well.
- Vinegar – Will help with the color development. You can’t skip out on using vinegar.
- Rubber bands – Any rubber bands will do. You could even use twine instead. Just something to hold your silk ties together.
- Old silk ties – You need 100% silk for this to work. Check the labels to make sure you’re not using polyester, which can look similar. Often silk ties are hard to find but search and you will find them.You could also use silk from an old blouse, a scarf, or whatever. If you’re rummaging through a thrift store, check out some other areas as well.
- White cotton fabric – I used a flour sack. You can get them super cheap! In the past, I have also cut up an old t-shirt that my kids have outgrew. Just about anything will work!
Instructions for Making Your Silk Tie-Dyed Easter Eggs
STEP ONE: Fill a large cooking pot with water, and add 2 cups of white vinegar. Place on medium-high heat. Bring to a boil as you complete the next steps below.
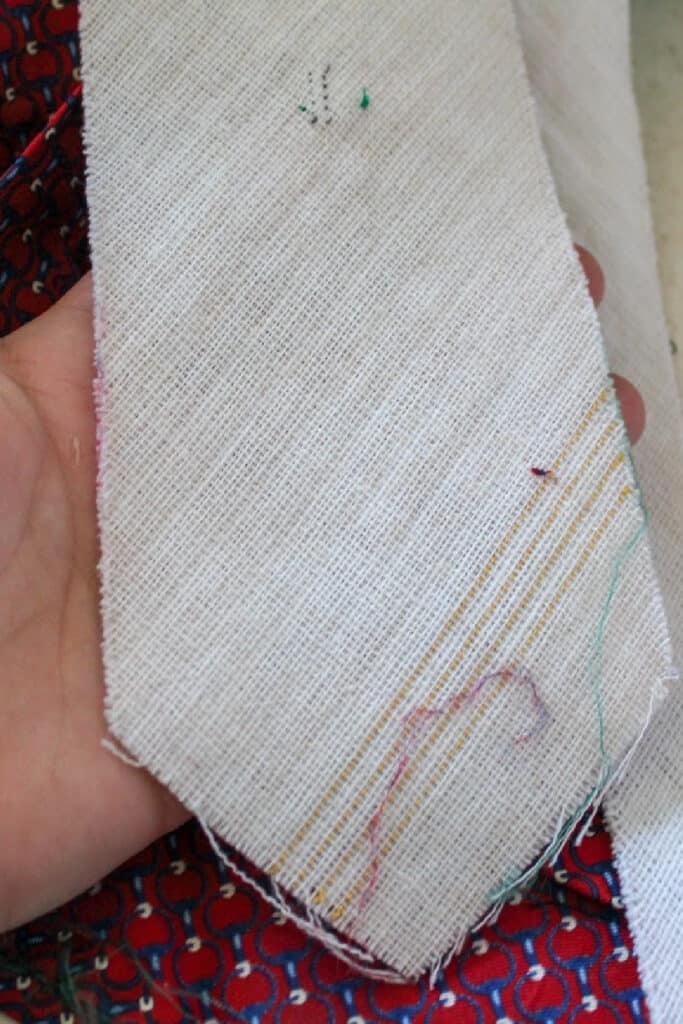
STEP TWO: Start by taking your tie apart. Cut down the center of the back of the tie to open it. Removing all the filler. Once open there will be enough silk to wrap about 3 medium or 2 large-sized eggs per tie.
Of course, this number will vary by your tie size.
STEP THREE: Once you are done deconstructing your ties, they should lie flat without any extra help.
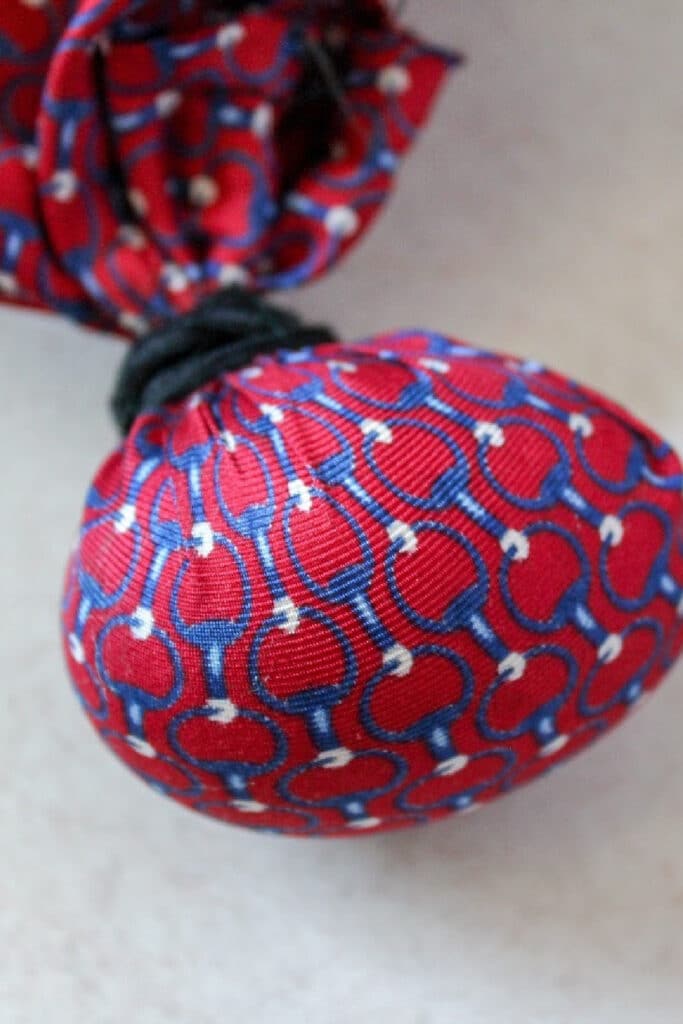
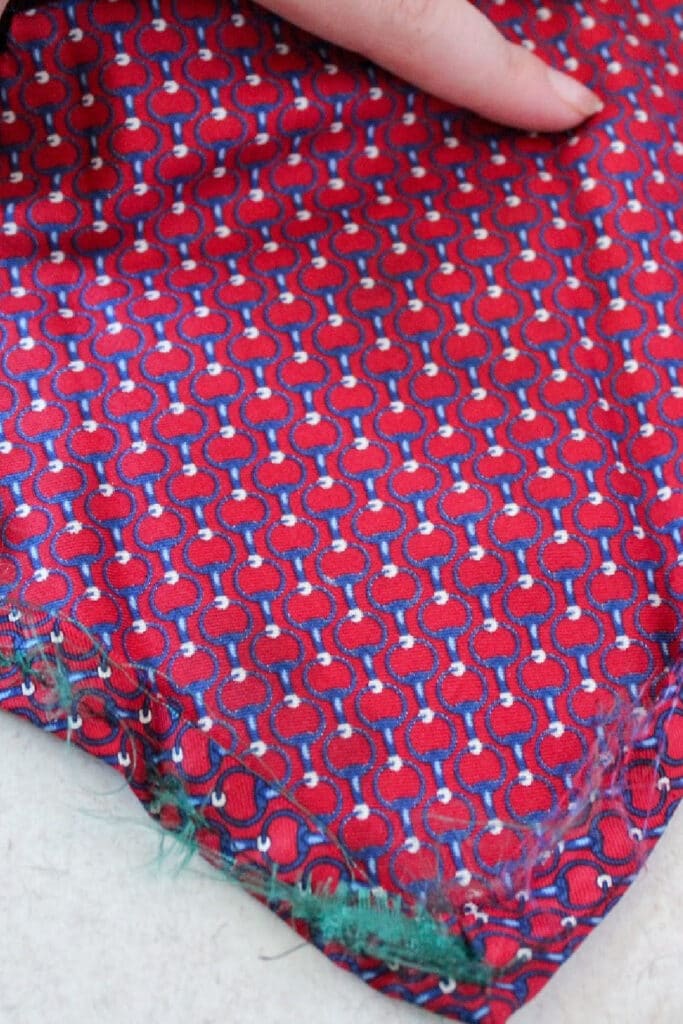
STEP FOUR: Next, cut a piece large enough to cover an egg. Wrap the egg with the right side of the fabric, making contact with the egg.
Quick note: The right side is the printed side or the side that would be on the outside of the tie.
Wrap the fabric as tight as you can around the egg without breaking it. The better the direct contact the silk has with the eggshell, the sharper and brighter the imprint of the pattern will be. Secure with a rubber band.
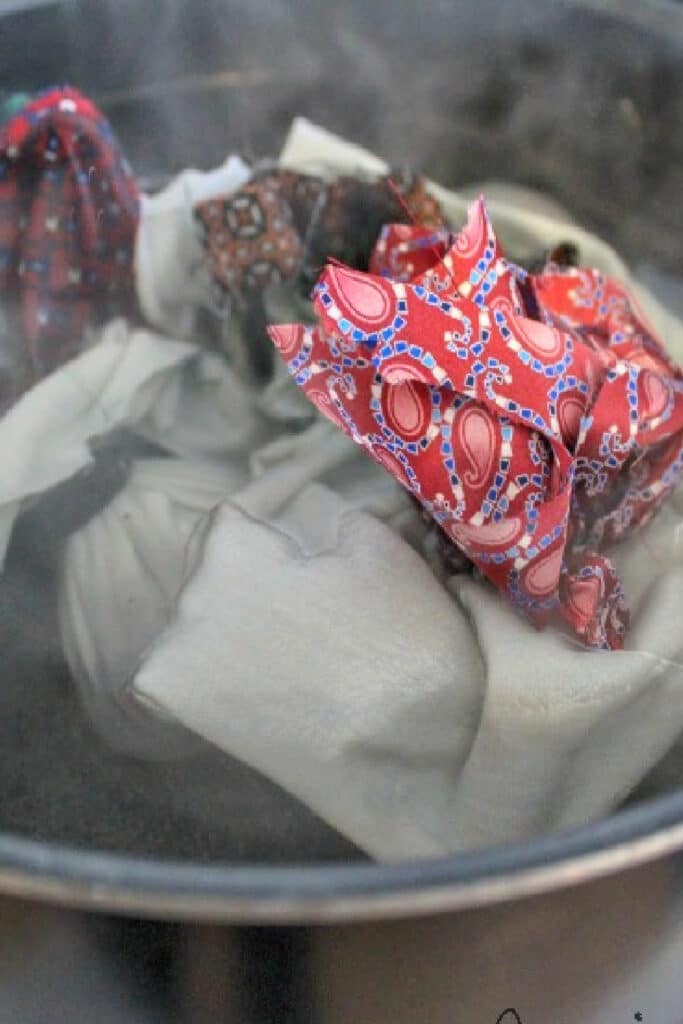
STEP SIX: Cut a piece of the white flour sack to wrap around the egg and do it over the tie. This keeps the color from bleeding from one egg to another. It also helps the silk stay tight and not shift so much.
Slowly and gently add your wrapped eggs into your pot of boiling water. Boil for 20-30 minutes.
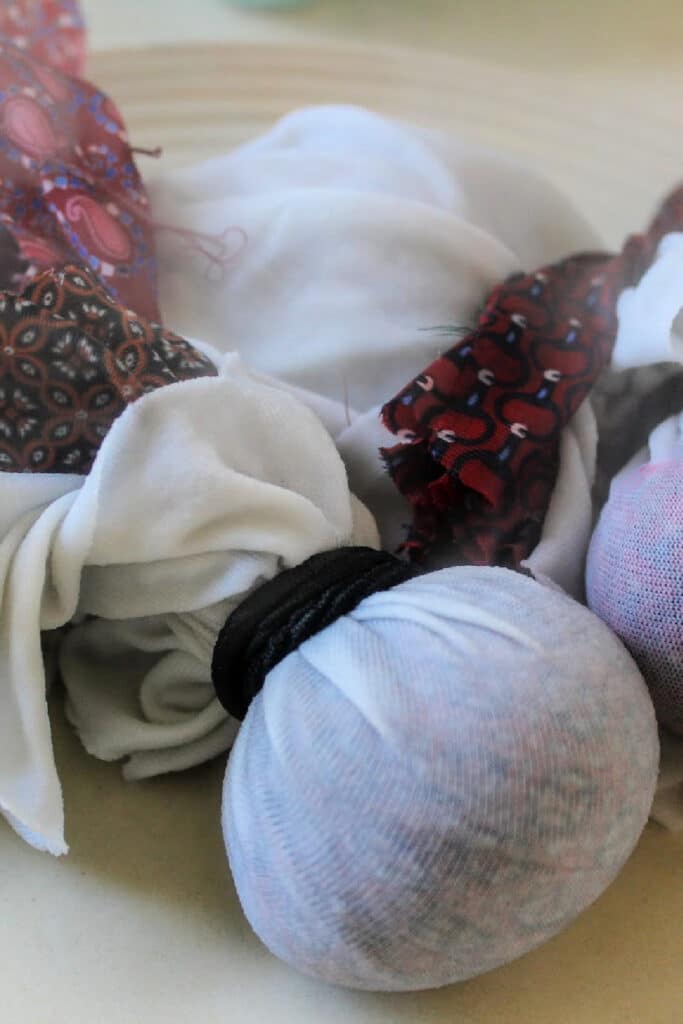
STEP SEVEN: Take them out of the boiling water (be careful they will be HOT). Once cool to the touch, begin unwrapping them to reveal their colors.

Other Fun Easter Ideas
Kid Friendly Easter Sugar Cookies
Non-Candy Easter Basket Filler Ideas For Boys & Girls
Easter Rice Krispies Egg Treats Recipe
DIY Silk Tie Dyed Easter Eggs Craft
Silk tie-dyed Easter eggs are so much fun to make and way less messy than buying a dying kit or using vinegar and food coloring! Make beautiful-looking dyed Easter Eggs with this easy DIY Silk Tie Easter Eggs Tutorial.
Materials
- 12 Eggs
- Silk Ties
- Rubber Bands
- 2 Cups Vinegar
Tools
- 4 quart sauce pan
Instructions
- Fill a large cooking pot with water, and add 2 cups of white vinegar. Place on medium-high heat. Bring to a boil as you complete the next steps below.
- Start by taking your tie apart. Cut down the center of the back of the tie to open it. Removing all the filler. Once open there will be enough silk to wrap about 3 medium or 2 large-sized eggs per tie.
- Once you are done deconstructing your ties, they should lie flat without any extra help.
- Next, cut a piece large enough to cover an egg. Wrap the egg with the right side of the fabric, making contact with the egg.
- Quick note: The right side is the printed side or the side that would be on the outside of the tie.
- Wrap the fabric as tight as you can around the egg without breaking it. The better the direct contact the silk has with the eggshell, the sharper and brighter the imprint of the pattern will be. Secure with a rubber band.
- Cut a piece of the white flour sack to wrap around the egg and do it over the tie. This keeps the color from bleeding from one egg to another. It also helps the silk stay tight and not shift so much.
- Slowly and gently add your wrapped eggs into your pot of boiling water. Boil for 20-30 minutes.
- Take them out of the boiling water (be careful they will be HOT). Once cool to the touch, begin unwrapping them to reveal their colors.
This post may contain affiliate links or sponsored content. Disclosure Policy

What a wonderful idea! I love it!