
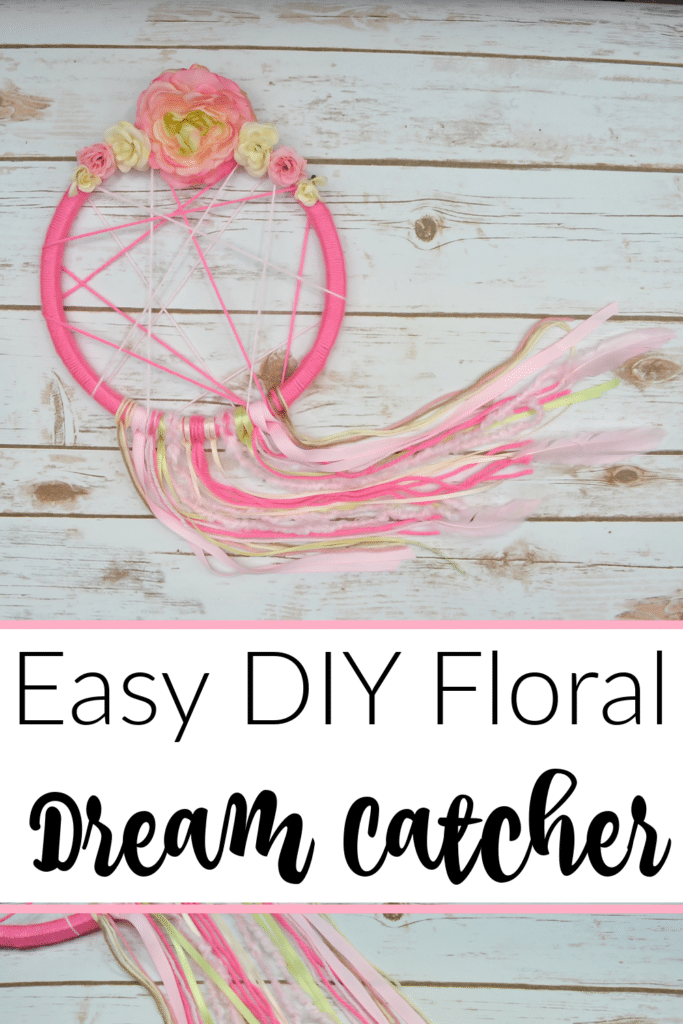
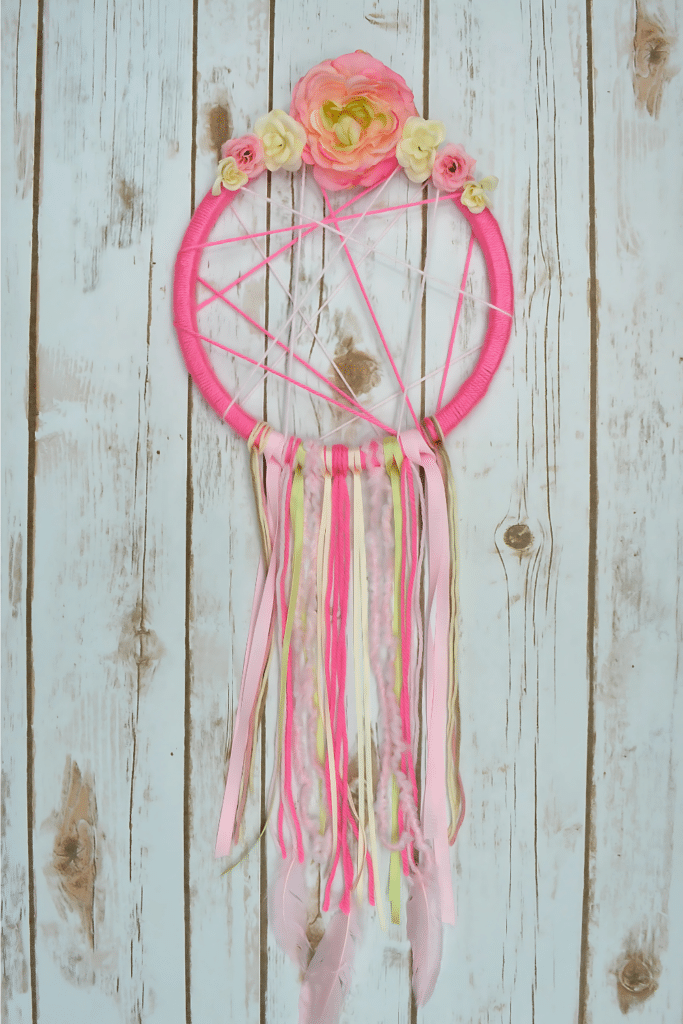
DIY Adorable Floral Dream Catcher Craft Tutorial
Looking for the perfect floral dreamcatcher? Why buy it when you can make it? Check out this complete step-by-step guide to make a floral dreamcatcher craft.
DIY Adorable Floral Dream Catcher Craft
Dream Catcher have become the “it” bedroom decoration. Have you always wanted to make one for yourself or a friend? I made this Adorable Floral Dream Catcher Craft for my daughter. She originally made one in school with a paper plate and yarn.
In all honesty, I do love it when they bring home crafts. But this homemade dreamcatcher craft has been haunting me. It is in her room, on her shelf. It looks like a big plate wrapped up in yarn. Her room is already cluttered, and this just makes it seem worse. Know this mama has some OCD issues.
I want to make her a super cute chick Dream Catcher. We did this craft together, and it was a lot of fun. With the popularity of these beauties only rising, the price tag is quickly following suit. I took to case and point and made them with my frugal-minded self. I didn’t do it all without spending an arm and a leg.
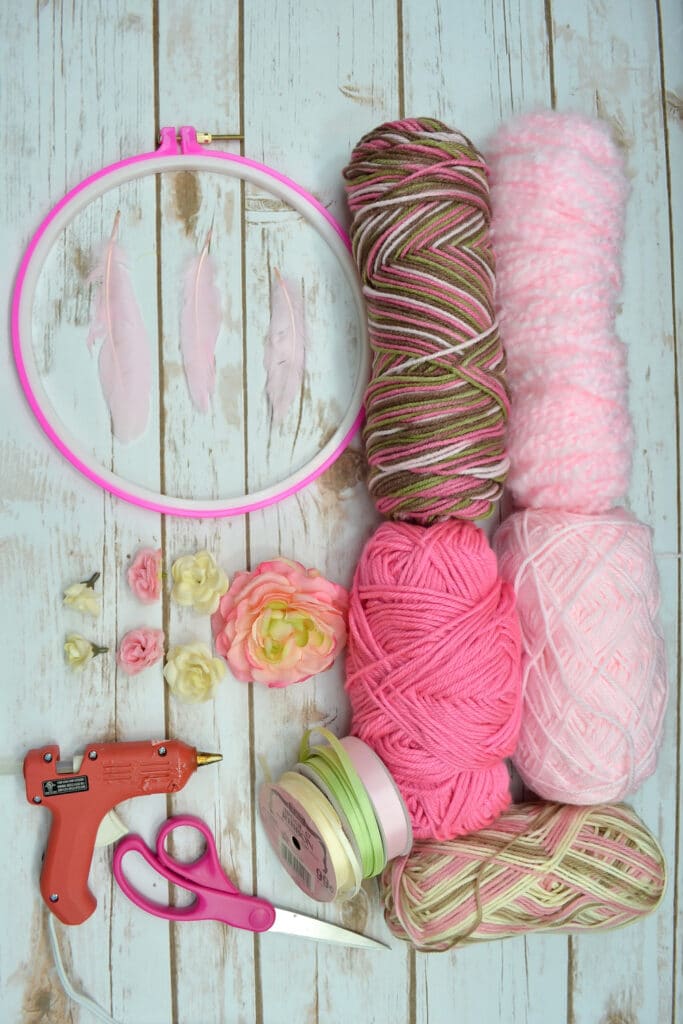
Supplies Needed
These supplies are the most critical to the craft – they are necessary regardless of the end design!
- Embroidery hoop
- Yarn: different colors and textures
- Ribbon: different colors and textures
- 3 Feathers: one large, two medium
- Flowers: 1 large, 2 medium, 2 small, 2 extra small
- Hot glue gun
- Scissors
How To Put Together This Dream Catcher
STEP ONE: First, tighten the embroidery hoop.
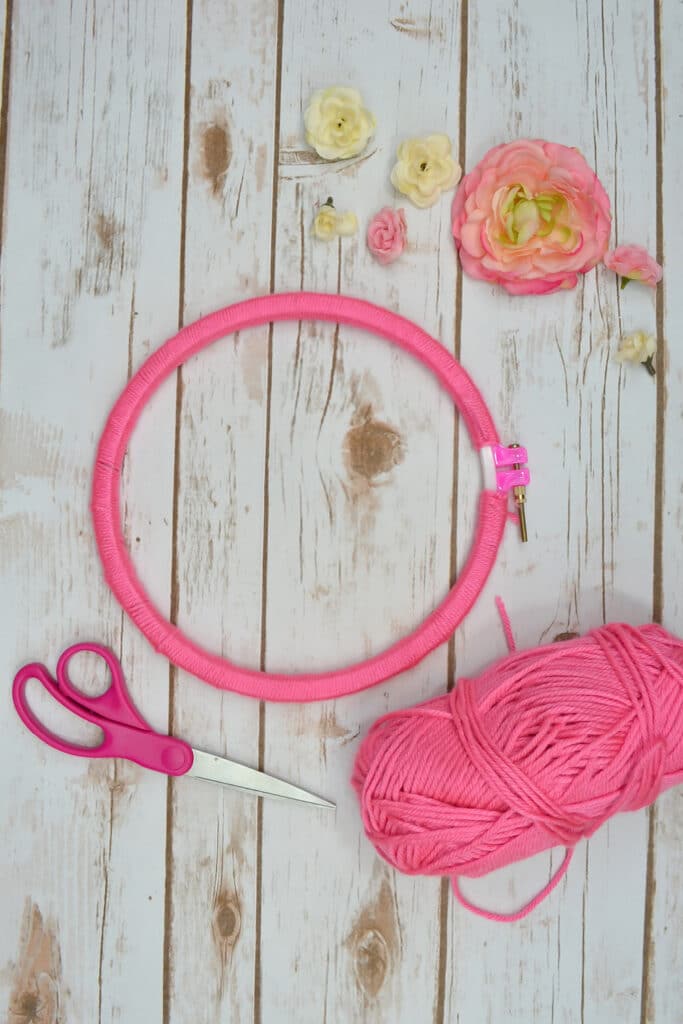
STEP TWO: Then, grab the pink yarn and double-knot the end of the yarn to the top of the hoop. Wind the yarn around the hoops over and over again. Once the hoop is completely covered in yarn, cut the end as a double knot at the top. Don’t worry about the loose ends, the flowers will cover these.
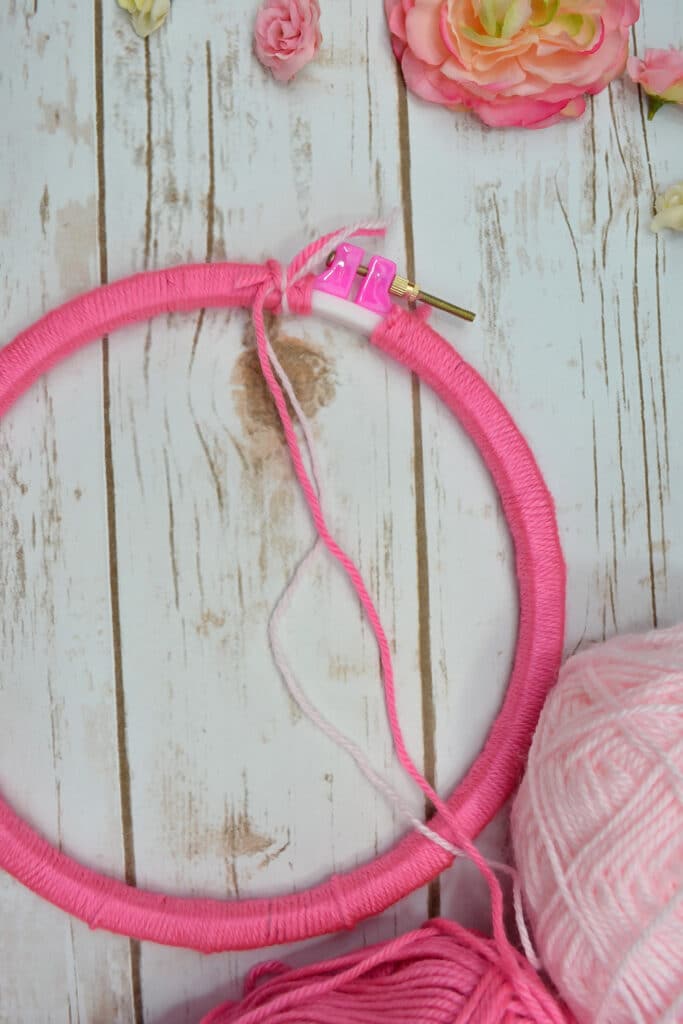
STEP THREE: Take dark pink and light pink yarn & tie them together at the top of the loop. Grab the dark pink yarn and wrap it across the hoop a few times in a random pattern. Make sure you tighten off your dark pink yarn in a knot to secure your piece as you are working. Repeat with the light pink yarn, and then end again by securing with a knot.
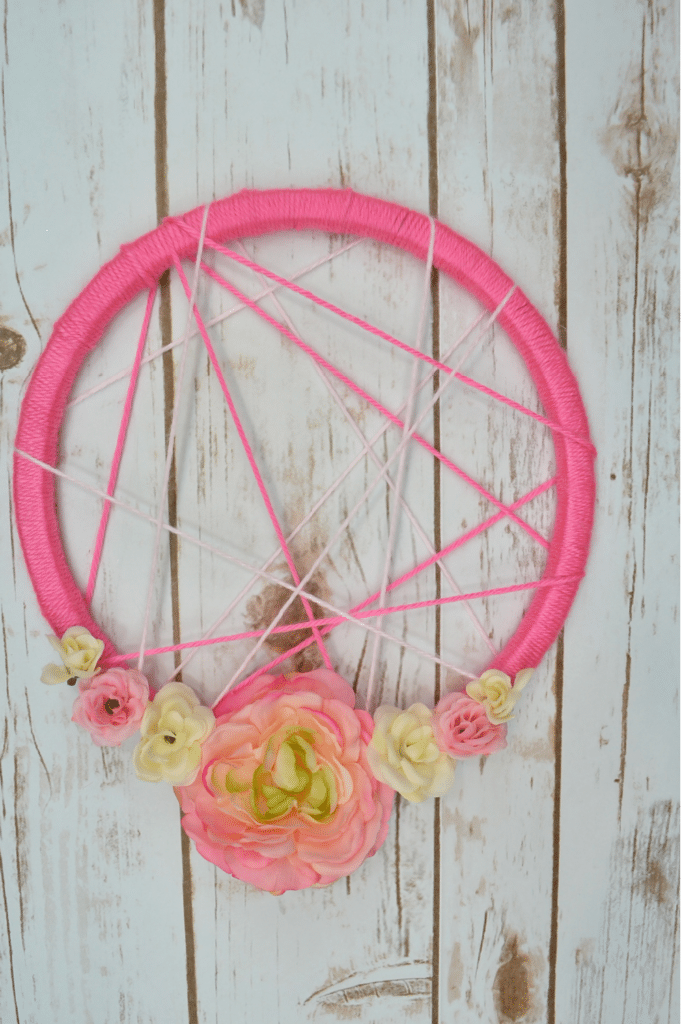
STEP FOUR: Hot glue the flowers at the top of the hoop, covering the screw and the loose yarn ends. Place flowers in the following pattern: extra small, small, medium, large, medium, small, extra small.
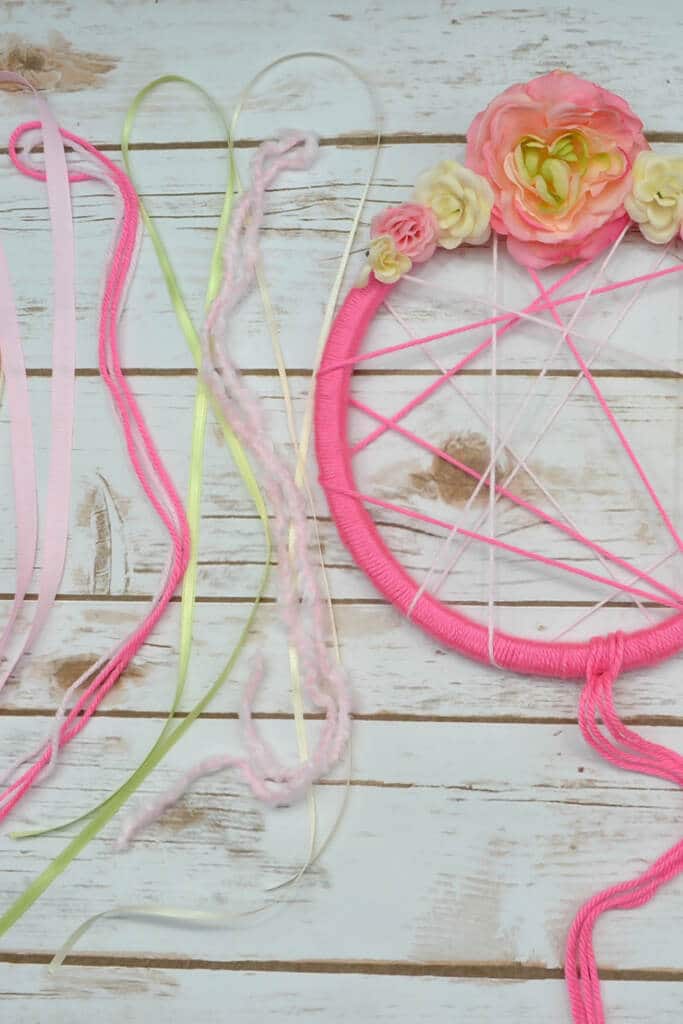
STEP FIVE: We are making 13 tails. To begin, measure and cut the yarn and ribbon to about 2x the height of the hoop. For the thinner yarn pieces, cut two pieces and tie them as one.

STEP SIX: Next, attach the tail yarns/ribbons, grab the length of the ribbon, and fold it in half, creating a loop. Feed the loop under and through the middle of the embroidery hoop. Take the loose ends and put them through the yarn loop & pull to tighten. Repeat until you have 13 ‘tails’ total.
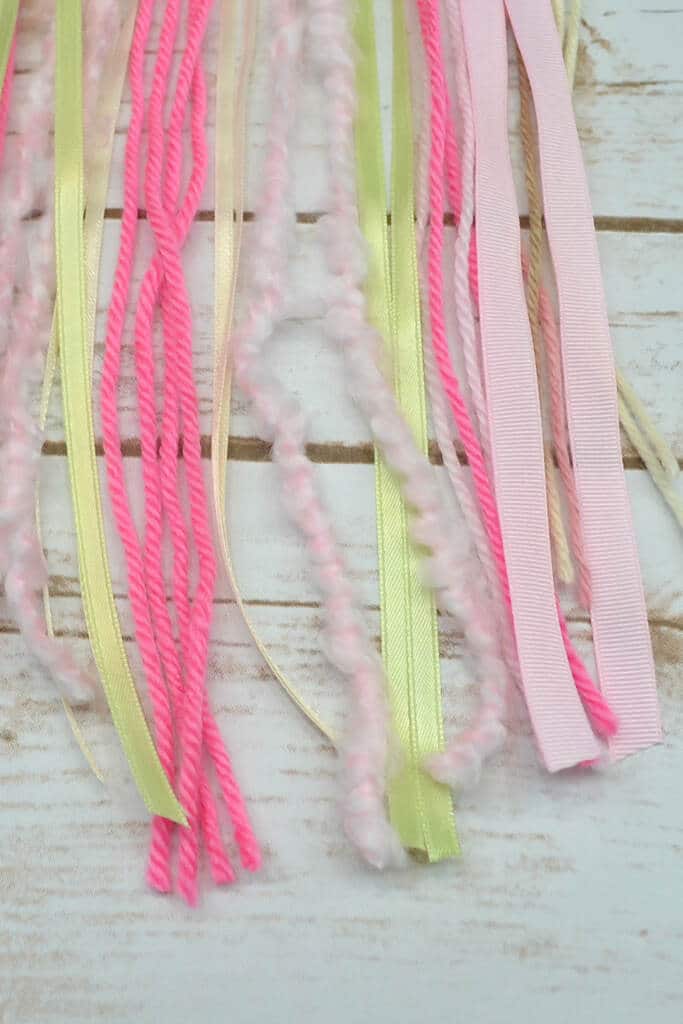
STEP SEVEN: Comb through the yarn and ribbon with your fingers to smooth. Then, take the scissors and trim the tailpieces to create a V-shaped pattern.
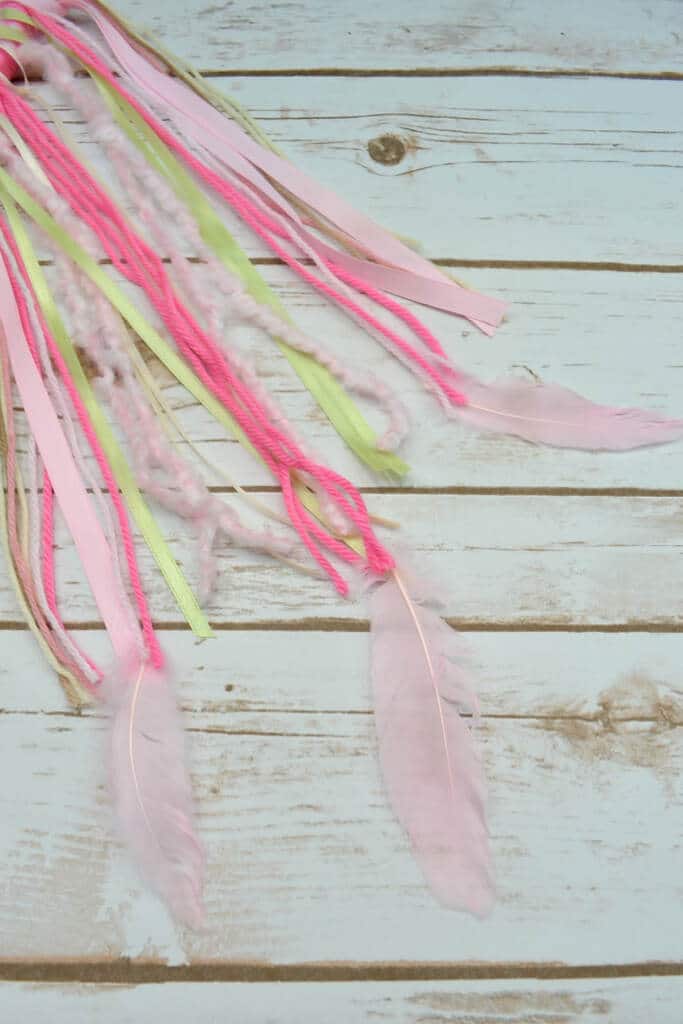
STEP EIGHT: Lastly, arrange the feathers. Then, attach to the ends of the yarn tails using a little bit of hot glue.
More Adorable Craft Ideas
DIY No Sew Outdoor Tassel Pillows – 6 Step Project
Mickey Mouse Mason Jars – Perfect for Holding Treats, Pencils or Supplies
Fun Birthday Party Game – Painted Rock Outdoor Tic Tac Toe Set
Valentine’s Day Love Bug Craft For Kids
This post may contain affiliate links or sponsored content. Disclosure Policy

5 Comments